If you’re a fishing fan like me, you know how frustrating it can be to spool a baitcast reel. It always seems tangled, and you have to start over again. But don’t worry, we’ll guide you on how to put fishing line on a baitcasting reel properly so that it doesn’t get tangled.
Correctly spooling a baitcaster is crucial for two reasons. First, you don’t want your line tangled when you’re casting. Second, a poorly spooled baitcaster can cause your lure to spin when it hits the water, making it less effective.
table of contents
- 1 How to Put Fishing Line on a Baitcasting Reel
- 2 How To Spool a Baitcaster Reel Yourself
- 3 How to Spool a Baitcasting Reel with Braided Line
- 4 How to Spool a Baitcasting Reel with Fluorocarbon
- 5 Frequently Asked Questions
How to Put Fishing Line on a Baitcasting Reel
Here’s a quick summary of what you’ll need to do:
1. Attach the rod to the reel
2. Pass the line through the guides on the rod.
3. Secure the end of the line by tying a knot.
4. Spool the reel by turning the handle
5. Trim the excess line
6. Fill the spool with filament, leaving a 1/8th inch gap at the outermost part of the spool
7. Apply pressure to the spool with your thumb
8. Begin casting
These instructions are specific to baitcasting reels, but the process is similar for other fishing reels. Before reading a brief guide on How to Spool a Baitcaster, ensure that you have a little knowledge of baitcaster parts.
What you need to have before spooling process is the following:
- A baitcasting reel
- A fishing rod
- Pencil
- Fishing line (monofilament, fluorocarbon, or braided)
- Scissors or line cutter
- A fellow angler (to hold filaments while you’re spooling)

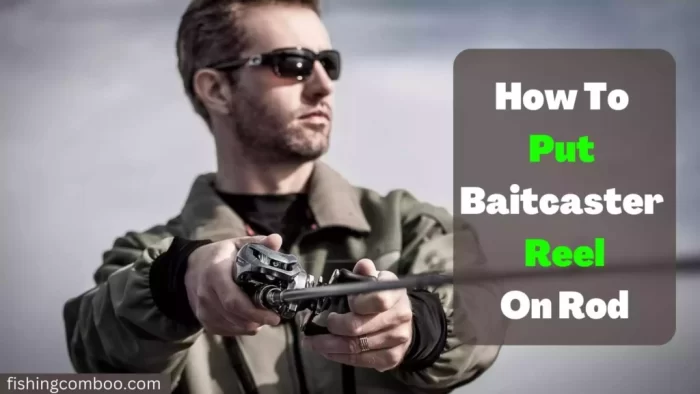
1. Attach the Rod to the Reel

You’ll need to start by attaching the rod to the reel. To do this, find the foot of the reel and then screw it into the bottom of the reel seat. Once it’s tight, you can put the bail (arm) in the up position and insert the line through the eyelets on the rod.
2. Pass the Line Through the Guides on the Rod
First, thread the line through the guide nearest to the rod’s tip. Then, continue running the line through the rest of the guides until you reach the reel. To avoid unsightly gaps, keep the line taut as you progress.
3. Tie a Knot at the End of the Line
Ensure to tie a knot at the end of the line once it has been threaded through all the guides. This will keep the line from slipping through the guides and getting tangled. For this activity, we suggest using a double overhand knot.
How to Tie a Double Overhand Knot
1. To start, insert the line through the eye of your hook or lure.
2. Wrap the end of the line around the standing part of the line several times. The frequency will depend on the line’s length. For example, if you’re using a 10-pound test line, you should wrap it around 3-4 times.
3. Make the end of the line wet, then pull it through the loop you created.
4. Tighten the knot by pulling on both ends of the line. Trim the excess line so that it’s flush with the knot.
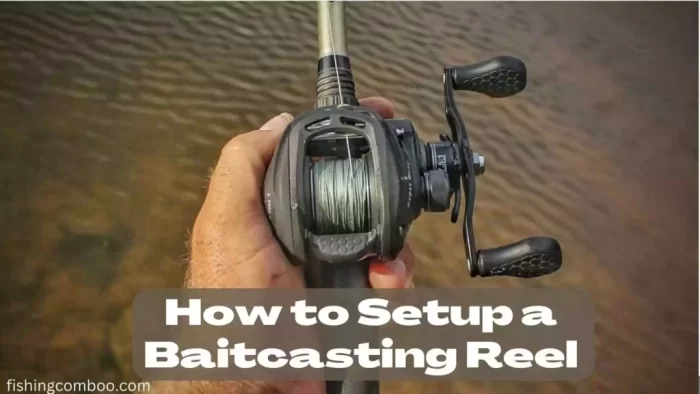
4. Spool the Reel by Turning the Handle

Now it’s time to start spooling the reel. You’ll need a fellow angler to hold the filament while you turn the handle.
First, take a Pencil and put it in the hole of the filament package so the filament will unwind easily. Now ask your fellow to hold the pencil from both ends vertically like a tire on an axle.
As he does that, start turning the handle of your reel slowly and evenly. The filament should be going onto your reel in a spiral pattern.
If it’s going on too fast or in a lump, you’ll need to adjust the tension knob. The knob is on the side of the reel, which you can turn either clockwise or counterclockwise.
Read About: Best Baitcaster Combo for Under $100
Why should you leave a 1/8th inch gap while spooling?
Always make sure there is a 1/8th inch space between the edge of the spool and the filament. This is because the line will expand when wet, so you must ensure enough room for it. Otherwise, the line could break when you’re casting.
According to some anglers filling the full spool is the best way to avoid line breakage, but that’s not always the case. If you fill it too full, the line can dig into itself and cause tangles. It’s best to play it safe by leaving extra space.
5. Trim the Excess Line

Once you’ve reached the desired amount of filament on your reel, it’s time to trim the excess. Leave about 6 inches of the line to tie a knot at the end. Then, use scissors or a line cutter to trim the excessive line.
6. Apply Thumb Pressure
Now that the line is spooled, you’ll need to apply thumb pressure. This keeps the line from coming off the reel while you’re casting. To achieve this, put your thumb on the line and apply pressure. The amount of pressure needed will vary based on the reel you’re using.
7. Enjoy Your Day by Casting Away
Now you’re ready to start planning your trip. The first cast may not go where you want it to, but practice makes perfect. In no time, you’ll be an expert at spooling a baitcasting reel. Have a great time fishing today, and may you catch some big fish!
How To Spool a Baitcaster Reel Yourself
If you don’t have a fellow angler to help you spool the fishing reel, don’t worry. You can still do it yourself. The process is the same, but you’ll need to use your foot to hold the filament.
By threading a pencil through the hole in the line spool, you can control the amount of string that is dispensed. Place one foot on top of the pencil, so the other end rests on your other foot.
This way, the filament is placed while you use your hand to turn the reel’s handle. As before, turn the handle slowly and evenly to avoid tangles.
Once you’ve reached the desired line, trim the excess and apply thumb pressure to keep the line from coming off the reel. Then, it’s time to start casting. With a little practice, you’ll be a pro at putting a line on a baitcasting reel in no time.
How to Spool a Baitcasting Reel with Braided Line

The process of spooling braided line is similar to what was discussed previously, but you must begin by using monofilament backing. After adding the monofilament, you can start adding the braided fishing line.
The reason for using monofilament as the backing is that if you use a braided line directly on the reel spool, it will cause friction and heat up. This will, in turn, damage your expensive braided fishing line.
Also, the backing line provides a buffer between the spool and the braid, resulting in smoother casting with less friction. It also eliminates any chance of the braid slipping or coming off the spool.
Now that you understand how crucial monofilament backing is, let’s start winding it onto the baitcaster.
Repeat the steps we went over in the last section. You will need to use monofilament backing, which is the only difference.
How to Add Monofilament Backing
1. Start by threading the monofilament through the tip guide of your baitcasting rod.
2. Then, wind the reel in a clockwise direction until there is about a quarter (1/4th of the spool) of monofilament on the spool.
3. Once the monofilament is on the spool, you can add the braided line.
You should follow the steps above to fill a braided line on a spool.
Advantages of Using Braided Line
- A braided line is much more durable than regular monofilament, so it’s a great choice for anglers who regularly cast in rough waters or snag their lines on debris.
- It also has a much higher knot strength so it won’t break as easily. As such, you can expect more bites with braided lines than with monofilament.
- The braided line is thinner than monofilament and has less stretch, which means you can feel the fish’s bite better and set the hook more solidly. This makes it easier to land bigger catches.
- Braided line also allows for longer casts, which gives you a better chance of reaching the fish in deeper waters.
How to Spool a Baitcasting Reel with Fluorocarbon

The fluorocarbon fishing line is very similar to monofilament, and spooling a baitcasting reel with fluorocarbon lines is also the same.
The only difference is that you need to use a slightly bigger diameter line because the fluorocarbon line is heavier than the monofilament.
Advantages of Using Fluorocarbon Line
- Fluorocarbon line is more abrasion-resistant than monofilament and, therefore, can withstand harsher conditions.
- Its low visibility makes it perfect for clear water applications, as the fish won’t be able to see it.
- It has a much better knot strength, so you don’t have to worry about your line breaking.
- It is slightly denser than monofilament, so it sinks faster and can be used to reach deep-dwelling fish more easily.
- Its higher density also makes for an improved cast, as the bait will travel farther with less effort required from you.
- The fluorocarbon line has low memory and won’t curl up, making it easier to manage on the reel.
- It is also more durable than monofilament, so it will last longer without needing to be replaced.
If you’re new to baitcasting, read our comprehensive guide below.
Read About: Which are the Best Baitcaster Lines for Beginners
Frequently Asked Questions
Can you put any line on a baitcaster?
Yes. While any type of line can be used on a baitcaster, it’s important to use one suited for the job. But you must be careful because baitcasters can carry heavier lines. If you use a light line on a baitcaster, it may cause the line to snap or the spool to spin too quickly.
Is it OK to use braided line on a baitcaster?
Some anglers believe that the braided line is too abrasive and causes excessive wear on baitcaster reels. In contrast, others claim it casts more accurately and causes fewer line twists than the monofilament line. It depends on your personal preference.
In the end, it all comes down to what you prefer. Some anglers find braided lines easier to use and more accurate than monofilament, while others find it difficult to cast and prone to tangling.
What pound line is best for Baitcaster?
The type of bait you use will determine it. For smaller baits, use a light line to make it more sensitive to bites. For larger baits, use a heavier line to cast further and increase the power of your hookset.
There’s no one “best” pound line for all baitcasters, as it depends on the individual fisherman’s preferences and the particular situation. However, most fishermen will agree that a medium-weight line between 15 and 25 pounds is versatile enough for most situations.
Conclusion
So, there you have it! Everything you need to know about how to put a fishing line on a baitcasting reel. Wrapping the line around the spool is an important part of baitcasting reel fishing. It ensures your lure will travel where you want it to and helps prevent tangles.
This process shouldn’t be rushed; ensure the line is wound tightly with no slack so that it will cast easily. Now that you’re an expert, which line do you prefer to use with your baitcaster? Let us know in the comments below!